Yesterday I shared here about Valentines Craft Week on These Happy Times. Pretty excited about this y'all! I've been making lots of fun things & I'm ready to share them with you.
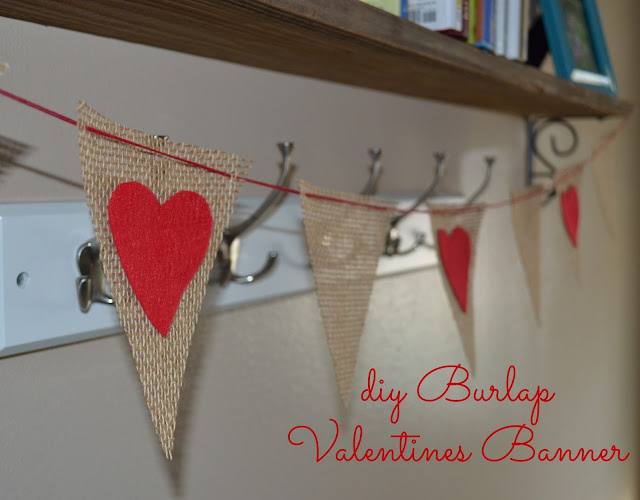
Today I'm sharing a tutorial for this easy DIY Burlap Valentines Banner.
Supplies Needed
fabric scissors
burlap
red fabric (wool felt)
twine or yarn
sharpie & pencil
heart object (I used a cookie cutter)
hot glue gun
needle to thread
ruler is helpful too
Lets get started friends!
First grab your ruler (or a straight edge) and draw seven-7 inch triangles onto your burlap. Its okay to draw on the fabric because when you cut the triangles out just be sure to cut inside the sharpie line. This way you don't have black ink on your cute banner.
Next take your heart object & trace around it with a pencil onto your fabric of choice. Don't use the sharpie to trace onto the fabric, because unlike burlap - most fabrics will bleed & it will not be too pretty. Just saying. I made 4 hearts for my banner, but make as many as your heart desires. Then cut them all out!
After cutting out the 7 triangles & 4 fabric hearts take a quick trip to your ironing board. The stiffer the burlap is the better. Ironing them 1st just makes it look nicer. Also means very little fraying of the burlap. Once ironed heat up your hot glue gun & glue on your felt hearts.
Next, with a needle & thread assemble your DIY Valentines Banner! I alternated between plain burlap triangles & those with hearts. Feel free to mix it up.
Hang it somewhere that you will see often & enjoy!
Our banner is hanging from the shelves in the reading room.
Tomorrow I'll share the DIY for this sweet little Valentines Wreath below.
I hope you are having a great day. Have fun making this Banner. Happy Tuesday!
~Brit


Love that banner! I'm in love with Valentine's banners I've been seeing around this year, so cute!
ReplyDeletestoriesofkel.blogspot.com